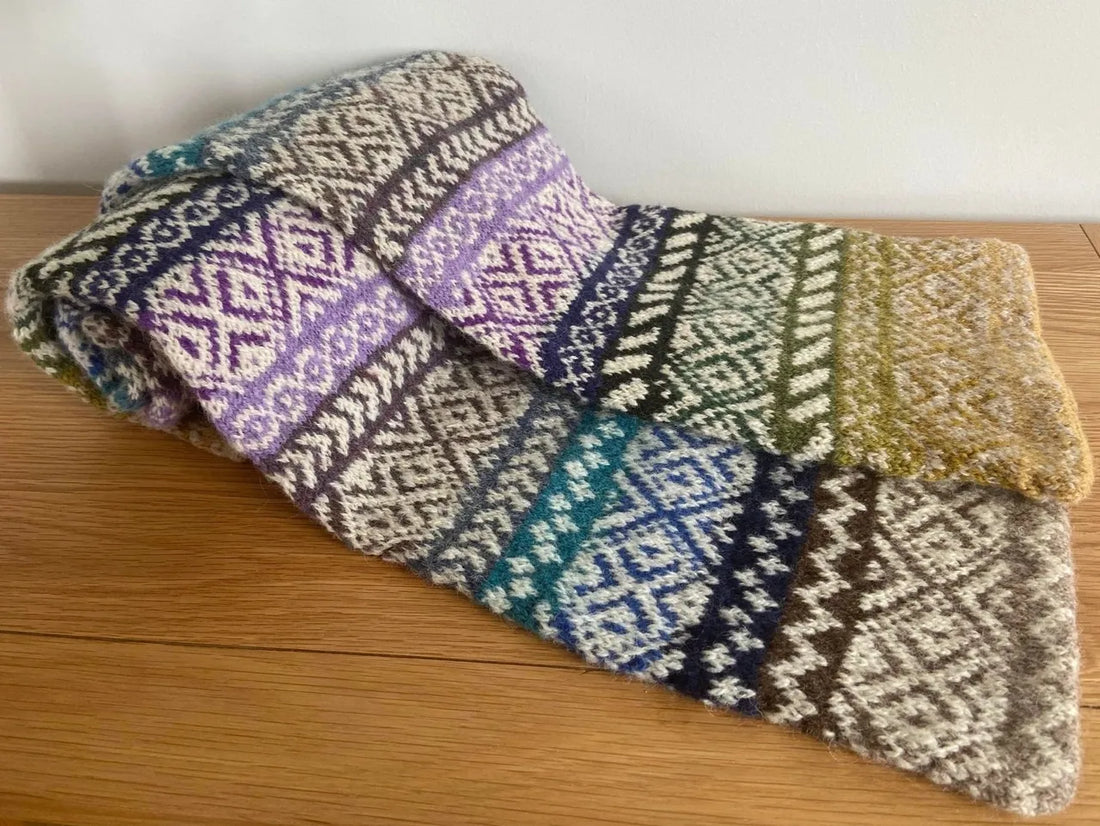
The Shifting Seasons Scarf
The Shifting Seasons Scarf is a pattern that was announced on the 31st of December as part of the Shetland Hogmanay Box 2024.
This box is an advent style box with gifts to open each day through December. Most of these were the colours used in the Shifting Seasons Scarf, with part of the pattern available on the 5th of December, knitters could cast on, but didn't know what they were knitting until the full pattern was released on the 31st. Surprise!!
Anne curates these boxes and launches presales in the spring, so keep a close eye on her. Not only that, when it comes time to open a parcel each day, she does daily vlogs on YouTube with Jana from Purl Together, it's a lot of fun to watch so go back and catch up or keep an eye in case they do it all over again in 2025! I know nothing, but I'm hoping they do!
Anne approached me in early 2024 to produce this pattern, she gave me a brief and I had a great time running with it.
--THE YARN--
5 yarn producers were to be included:
and of course this was the perfect excuse to visit all five!

Pictured: Natural whites from all producers
The pattern uses the natural white from each producer as the motif colour, and 3 other colours in the background, the use of colour is not symmetrical as you would usually find in traditional Fair Isle, however they do blend from one yarn producer to the next to create the harmonious gradient effect you get with the end result.
A lovely part of this project having yarn from different places is that each section has a lovely texture, slightly varied from each producer. A nice way to have a sample of each producer in a wearable piece of knitting!
--MOTIFS--

Motifs used are some of my favourites, one large motif to keep things matching despite the swift colour changes, plus a different small border pattern to go along with each yarn producer.
The idea was that a different border for each yarn producer would add interest, but the artist in me was of course making a point as well... the border can change the look/feel/tone of the larger motif and in turn, the entire piece.
The larger motif almost looks different depending on which border it is with. I have noticed that more effort is often put on the larger or centred motif, however the smaller patterns framing it can at times have a larger impact... this is something I could dive more into, let me know if you are interested in the comments.
--KNITTING IT UP--
A few options are included depending on how long you want to make the scarf:
-
after one repeat of all colours you could have a snug cowl that wraps once
-
after a second repeat you could have a longer cowl, wrapping twice
-
three repeats of the pattern and you could have a longer scarf (my personal favourite option)
Finishing is simple, turn your scarf inside out and secure everything, the beauty of this pattern is that there is no need to weave in ends! Once you're happy with your seam just secure and trim ends so there are no lumps of ends on the inside.
From there, unpick your provisional cast on so you have raw stitches at both ends and follow grafting instructions depending on the finish you're looking for. All details are there in the pattern for you.
COLOUR SELECTION - You Can Do This!
Step 1 - Motif Colour. Deciding this early on will help with all of the other decisions you have to make. There are two rules to follow if you'd like to make sure you finish with a similar aesthetic to the original pattern, while also making it your own. Trust me when I say these will get you results and make life easier too:
-
Use the same colour for all motifs
-
Choose a colour that is either VERY light, or VERY dark (This could be the palest pink, or the darkest navy, anything you want!)

Step 2 - Take it one section at a time. Dive right in and choose a set of 3 colours that sit nicely together in a gradient. Gradients can either be going from dark to light, or moving from one colour into another.
Remember: all of these colours will be knitted with your motif colour, so make sure there is enough contrast between your motif colour and every other colour you choose
Step 3 - Build up your scarf. Now it's time to add sections, keeping the 3 colours you have already chosen in the same order, add to them to continue a gradient until 18 colours are included in total AND the gradient comes full circle.
Note: you will have a motif colour for each section as well, so the total included in this pattern is 24 colours.
Step 4 - Swatching. There are a few ways to do this, and I tried out a few of them before I cast on all the stitches for this project. These are the stages of swatching I went through:

-
Yarn Wrap: What I'm looking for here is that the 3 background colours have low contrast with each other and sit harmoniously in the gradient order I plan to knit them in, while the motif colour on top clearly contrasts with all of the other colours.
 Pictured: My colour only swatch
-
Colour Only Swatch: This quick zig zag swatch allowed me to check how the sections blended into each other, and a double check that the white contrasted well while knitted
")
-
Motif and Colour Swatch: I did a full swatch here, starting and ending with the same section to make sure the gradient worked continuously. This was done using my knitting machine and using only one of my border motifs, another experiment I was running!
Step 5 - Cast On!
PS... THE INSIDE!
Tidying up my ends was much more enjoyable when the inside is just as lovely as the outside!

I have so many pictures like this on my phone, peering into the inside was so exciting!!

Then turning it inside out to tidy up loose ends..
d r e a m y